
|
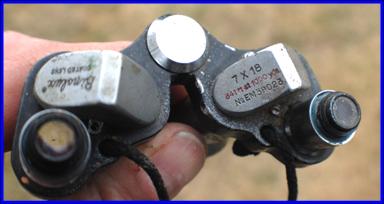
Japanese External Reverse Porro Prism Binoculars. VIRTUAL MUSEUM |
|
Mark Ohno |

|
PHOTOS MARK OHNO |
|
Collimation of Miniature Binoculars. Kollimation der Prismen der Miniaturferngläser. Collimation des Prismes des Jumelles Miniatures. 小型双眼鏡 のプリズム調整 Коллимация миниатюрных бинокль. Kollimering av Miniatyr Kikare. Colimación de Óptica Prismáticos en Miniatura. Collimazione di Binocolo in Miniatura. |
|
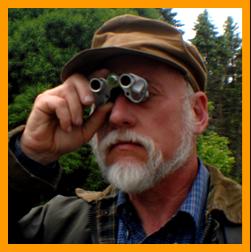
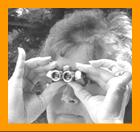
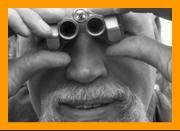
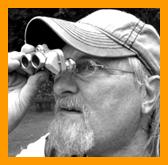
In simple terms, and as I understand it, binocular collimation is the positioning (alignment) of the prisms relative to each other such that the optical images of the two sides of binoculars are superimposed, and as a result the user perceives a single image. When the prisms are not aligned, one sees a double image or a ghost image from the less dominant eye, as simulated by my friendly local raccoon in the left hand picture above. It is not unusual for miniature binoculars to have been dropped over the years, and some percentage of both individual focus and center focus models show up with collimation issues. Also the prism positioning screws may simply loosen up over the decades. It is often possible for a collector to engage in a successful remedial correction by following the procedures below. This is sometimes referred to as conditional alignment collimation. Another more sophisticated instrument based collimation or 3 axis collimation makes the optical axis of both barrels parallel to the hinge, but this adjustment is beyond the scope of hobby remediation. |

|
Not collimated (just hungry) |
|
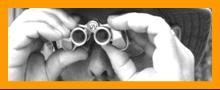
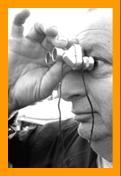
Collimated.and still hungry. |
|
The vast majority of these miniature binoculars have prism positioning or adjusting screws, but a few don’t. |
|
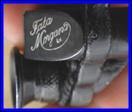
1920’s Fata Morgana binoculars have prism adjusting screws. |
|
Screw hole typically filled with dirt or intentionally filled with wax. |
|
But these economy Omega binoculars do not have prism adjusting screws. |
|
1950’s RKK binoculars have prism adjusting screws. |
|
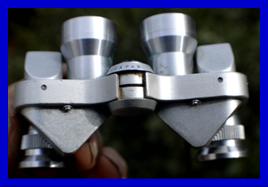
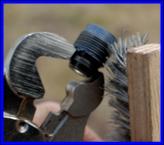
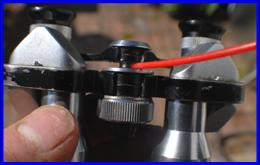
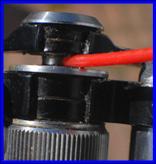
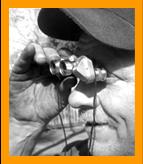
The process of shifting the prisms in the direction of the arrow is to: unscrew # 1 to create room, and then screw in # 2 to move the prism. Normally this would be done with the prism cover in place (it is shown here to demonstrate what is actually occurring). You normally move the prism a little and then look, then repeat. You may run out of movement on one prism. Be gentle: if you run out of room for the prism to move and continue to tighten the screw you will chip the prism. |

|
To address this issue (right-left), I would move the left horizontal prism right, or the right horizontal prism left. You shift the prisms the same way as the image shift you desire. |

|
To address this issue (up-down), I would move one of the vertical prisms up or the other down. |
|
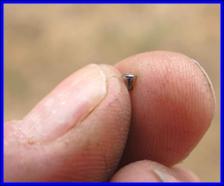
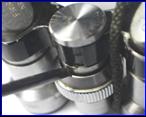
Prism screw. There are 8. |

|
Avoid completely removing the Prism screws. The result is a tiny easily dropped / lost screw you cannot replace. |
|
Cleaning Prisms. Säubern der Prismen der Ferngläser. Comment Nettoyer les Prismes des Jumelles. プリズムを清掃してください. Rengöring kikare Prismor. Limpieza Prismas Prismáticos en Miniature. Praticanti do Pulizia. |
|
These small binoculars are not particularly well sealed. So you will sometimes or often encounter ones that have dirty internal prisms and lenses that you might want to clean. Here is how to clean the prisms. |
|
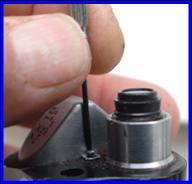
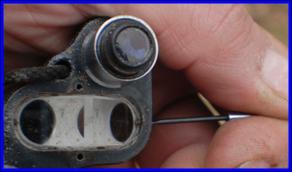
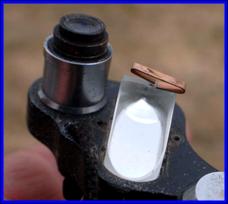
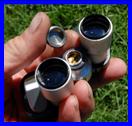
Remove the two screws holding one of the prism covers on. |
|
These screws are small, so remove them over something that will catch them when they fall. Which they will. They can sometimes be retrieved out of the rug with a magnet. |
|
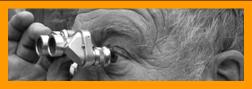
I like to sight on a light fixture 20 feet away to make adjustments, as it ghosts particularly well and in all directions. Plus it doesn’t eat my seed so fast. |
|
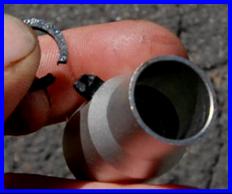
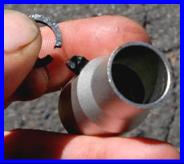
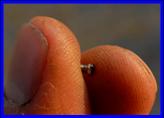
The prism covers fit down into the binocular frame, so you may have to rock them a bit to pull them free. There is a spring in the prism cover. The first two types shown sometimes appear on late binoculars, and tend to stay in the cover, which is nice. But the common one is the last type, which usually falls out when you remove the cover. In fact this one dropped off my finger just as I snapped the picture with my other hand. Even though I saw exactly where it landed, I still couldn't find it. And being non magnetic, the magnet trick didn’t work either. |
|
If you remove a prism to clean the underside, be try to mark on the frosted part with a pencil so you know what side went where. |
|
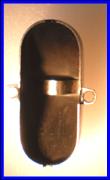
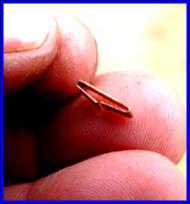
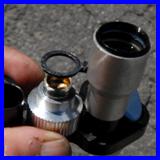
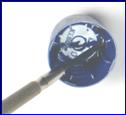
This is how the spring goes. But the prism cover usually knocks it off when you try to replace the cover (you will hear the spring rattle in the prism cover). If I get a couple unsuccessful attempts at replacing the cover, then I will break down and stick a bit of double sided tape on the flat of the spring and stick it into the prism cover. |
|
Most prism covers will go on with either orientation. What is the likelihood of putting them back the wrong way? Well it’s a 50-50 shot to start with... and if you are distracted by the spring being knocked off 3 times… and happen to be holding them upside down at the time... well then you will probably be embraced by some equivalent to Murphy’s law. (Sods law in the UK, LEM/ Loi de l’Emet ê ment Maximum in France, SNAFU in US military culture, Finagle’s law, Sturgeon’s law, la Ley de Murphy in Spanish speaking countries, Pravno Murphiego in Poland, закон подлости in Russian, and 失敗 する可能性のあるものは、失敗する in Japanese. People may not agree about much, but attitudes to the probability of things getting screwed up are universal. |

|
Well... F*ck me!! |

|
Repair Center Focus Binoculars: Freeing The Seized Right Side Adjusting Ocular. Fernglas Mitteltreib, Rechte Seite Okular. Le Mécanisme Saisi Pour Focaliser, Côté Droit Oculaire. Riparare il Binocolo di Messa a Fuoco Centrale: Libare il Lato Destro Preso a Regolazione Dell’oculare. |
|
On most center focus binoculars , you focus by rotating the center wheel until the left eyepiece is in sharp focus, then if necessary, you turn the right hand active diopter ring to bring the right side into sharp focus. This focuses the instrument and also sets it up for the any vision difference between your left and right eyes. In much the same way as on independent focus models, the active ocular can be seized. |
|
On center focus binoculars, one diopter ring is active (usually the right one) and the other ring is inactive (a fixed or free spinning diopter ring). The way to tell which one is active is that the active diopter ring normally has numerical markings and the inactive one normally doesn’t. |
|
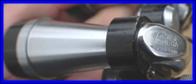
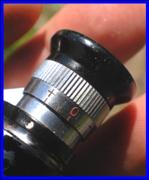
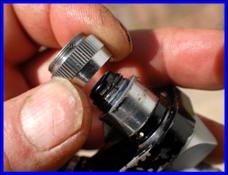
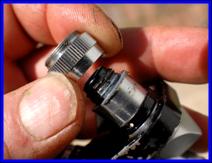
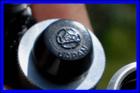
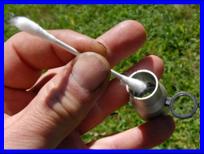
To repair a seized ocular, start by unscrewing the eyepiece. |
|
! |
|
I’ve repaired a huge number of these small binoculars and still drop and lose a tiny screw once in a while. So I strongly recommend working over tray, table, box, plate or something else to catch any small screw that drops. |
|
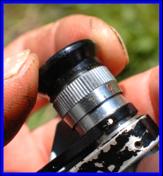
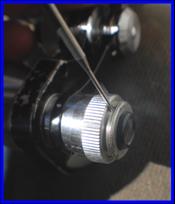
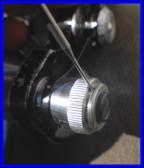
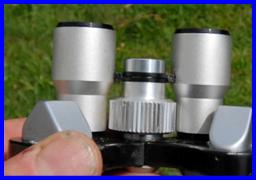
Next loosen the three set screws on the diopter ring. Try to get them most of the way out but not so much that they come out altogether. |
|
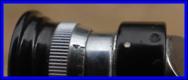
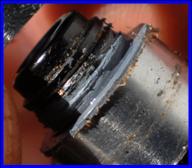
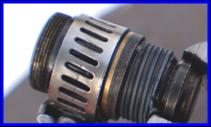
Remove the diopter ring. This will usually come off easily. But the tolerances are tight, and sometimes hardened optical grease on the diopter ring or around the lip of the ocular barrel will let the ring freely spin but not want to pull off. In that case wiggle and pull more energetically. On rare occasions I have had to heat the ring to get it to come off. |
|
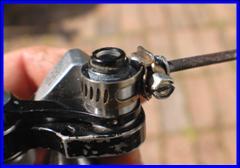
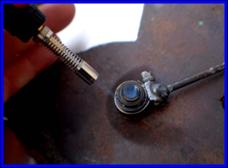
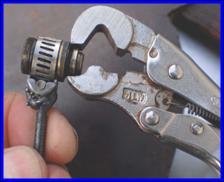
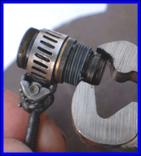
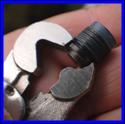
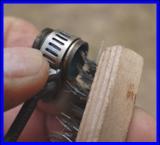
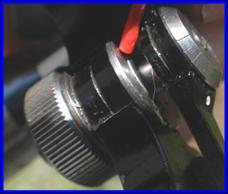
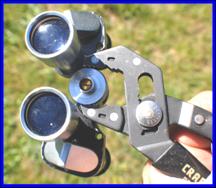
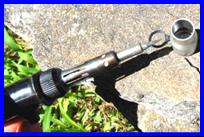
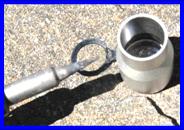
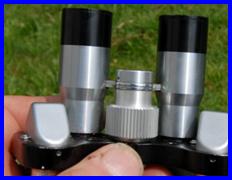
Remove the ocular barrel using the hose clamp tool. |

|
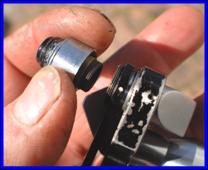
Use your butane pencil torch to heat the join between the ocular and ocular barrel. DO NOT use any other type torch other than a pencil torch. Do not use a hot air gun. Do not put parts in the oven. Avoid heating the glass. Avoid burning the paint off the ocular barrel. You want it just hot enough to soften the solidified grease so the ocular turns out of the barrel freely. Do not be afraid to reheat a couple times until you get a feel for what is just hot enough. I find the grease will just begin to bubble when it is hot. Handle with the clamping tool as the parts will get too hot for your fingers. |
|
! HOT PARTS |
|
When hot enough the ocular will turn out with very little or no force needed. Use the special vice grips ( with non serrated jaws ) but with the adjusted screw turned out so it is not in a clamping mode. Grip with only very modest force: these are easily deformed brass parts. If it doesn’t want to turn very easily, such as you could do with your fingers if it wasn’t too hot for your fingers, then it needs a bit more heat. |
|
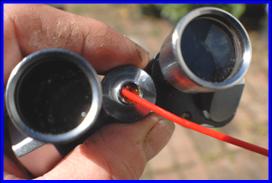
I like to use a hobby wire brush to remove most of the rubbery grease from the ocular threads and from the ocular barrel threads. I do not remove it all. Ocular grease is not lubricating grease or lubrication: its function is to allow the parts to move with controlled friction. I use an expedient method of reusing a small amount of the old grease. |
|
If you can find true optical grease of a formulation you like and can obtain, then use it.
I use the expedient of leaving some the old coating for resistance, and adding some easily obtained silicone grease to the threads to get a free yet solid feel in rotation. |
|
Replace the ocular in the ocular barrel and run it in and out until you get a smooth pleasant, and free action. You should be able to do this with your fingers. |

|
Replace the ocular barrel in the binocular frame, and snug with the hose clamp tool. |

|
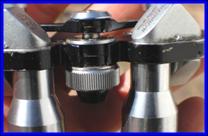
Replace and align the diopter ring and snug the 3 set screws |

|
Replace the eyepiece |
|
Repair Seized Center Focus Mechanism on Miniature Binoculars. Mechanismus für die Fokussierung. Rèparer le Mécanisme de Mise au Point Cnetral Saisi sur des Jumelles Miniatures. Reparera de Centrala Fokus Kikare: fri Beslag Ocular. La Reparación de un Mecanismo de Enfoque Centro Incautadas en Miniatura Prismáticos. Ripare il Meccanisimo di Messa a Fuoco Centrato sul Binocolo in Miniatura. |
|
The symptom of this problem is that the center focus wheel is impossible to turn, or is very hard to turn. This repair is based on lubrication. NOTE: solidified optical grease also often causes these symptoms. To address solidified optical grease see “Repair Seized Center Focus Mechanism on Miniature Binoculars” on the page - MORE REPAIRS #3 |

|
Of the couple dozen or so penetrating lubricants I have used, I prefer PB Blaster™ as it is particularly good at working its way into tight tolerances. Available at auto parts stores, or online. Other lubes will work. Whatever lube you use pick one that has a button able to use a precision straw !!! PB Blaster has the right button, but does not always have the straw. But the red straw from anything else works. |
|
Binoculars are best when they have crystal clean lenses. Penetrating lubes creep (spread) and are hard to clean off lenses. Do not apply a penetrating lube to any part that is likely to spread lube on the lenses. Use a very restrained amount of lube, and apply it precisely where it needs to be. |
|
These Rainbow center focus binoculars are typical of the a center focus model adjusting the oculars, and the center focus mechanism on this one is seized. Before starting, if you have another functioning center focus binocular, use it to examine what parts move on the functioning pair, as this will be where you need to apply lube. |


|
straw |
|
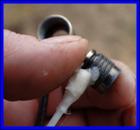
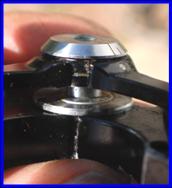
Lubricate the center shaft. Only a little lubricant is needed. Practice coaxing just a little lube from the push button if you need to, to avoid having binoculars dripping lube! |
|
Unscrew the plastic or metal cover on the objective side of the focus mechanism. |
|
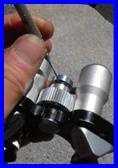
If the mechanism is seized in an open position, then lube the join shown here. Also the join on the wheel marked “B” |
|
Lube around the screw shown here. |
|
Having lubed the parts you need to be free, you must now get some movement by working the focus wheel back and forth, starting with small movements, in order to help work the lube between the parts. If you can possibly accomplish this with your fingers, do so. If you must resort to a tool, I prefer the Robo Grip™ self adjusting pliers shown above as being less likely to slip and damage the wheel. You may want to wind tape around the wheel before griping it . BE AWARE that using a tool has a probability of marking the wheel ! DO NOT attempt to turn the wheel by force. Just wiggle it to help the lube get between the moving parts. Re-lube a couple times in the process. Be patient and let the lube penetrate. The amount of free movement will get progressively greater until it is free throughout the full range of motion. If you are really patent you can lube a few times over a couple days and see if time by itself will do all your work for you. I am not usually that patient, nor optimistic. Bewegen Sie dann den Mechanismus ein Stückchen auf einmal, um es freizugeben. Geduld wird angefordert. Déplacez alors le mécanisme un peu à la fois pour le libérer. La patience est exigée. |
|
When done, replace the cover. |


|
Pursuing a More Technical Approach To Collimation. Kollimation von Prismen : Technischere Methoden. Collimation : des Méthodes Plus Techniques. Ett Mer Tekniskt till Kikare Inbländing. Colimación Óptica de Prismáticos: Un Método Más Técnico. Perseguendo un Approcio Più tecnico Alla Collimazione. |
|
If you wish to take a much more technical and mathematical approach to collimation, which goes far beyond my field expedient of merely getting a visual single image, and which addresses getting both the optical and the mechanical axis parallel (“true collimation” ), but without using professional collimation equipment, I can recommend the following website written by Rafael Chamón Cobos :
https://sites.google.com/site/rchamon/home/sun-images-method-for-collimation-of-binoculars
Since the prism arrangement is a bit different on the larger binoculars he is using, some corrective procedures of prism adjustment would be slightly different for the “miniature” reverse porro prism binoculars. |
|
How to repair miniature binoculars. 小型双眼鏡修復 する方法 Anweisungen für die Reparatur von kleinen Ferngläsern Hoe te herstellen miniatuur verrekijker. Comment réparer les jumelles miniatures Hvordan å reparere miniatyr kikkerter Instrucciones para la reparación de los prismáticos en miniatura Hur reparera miniatyr kikare Как отремонтировать миниатюрные бинокль Le istruzioni di riparazione per binocolo in miniatura |
|
Erhalten der Bewegungsfreiheit des mechanismus für die Fokussierung. Ein Durchdringungsschmiermittel muss an den genauen Punkten angewendet werden. Bewegen Sie dann den Mechanismus ein Stückchen auf einmal, um es freizugeben. Pour libérer le mécanisme central saisi pour focaliser, un lubrifiant pénétrant doit être appliqué aux points précis. Déplacez alors le mécanisme un peu à la fois pour le libérer. |
|
Repair the Binocular Broken Center Focus Mechanism. Gebrochene Mechanismus für die Fokussierung. Rèparer le Mécanisme Cassé Central Pour Focaliser. Reparer el Mecaniso de Enfoque de Prismáticos en Miniatura. Reparare il Meccanismo di Messa a Fuoco Centrale Spezzato. |
|
Some late production center focus binoculars, and particularly those made by Tochihara Optical Co, and which adjust the objective lenses with the center focus mechanism, substituted plastic arms in place of the metal arms used previously to transfer movement from the center focus screw to the objective lens barrels to move them in and out. If the barrels bind, which is not uncommon, these plastic parts tend to break, making this a marginal design, in my opinion. The flexible plastic (probably polyethylene) utilized does not seem to lend itself to adhesive repairs by any of the common families of adhesives such as butanone, dichloromethane, cyanoacetate eters, acrylonitriles, epoxy resins, urethones, polymides, or polyos. (it is used on glue caps) l recently experimented with plastic welding, which seems to be a more practical repair method, and this procedure is illustrated. In this case the repair is on a Tochihara produced Boots Courrier branded 8x20 CF binoculars. |
|
This center focus design moves the objective lenses and barrels with low quality economy black plastic parts. Not so strong and prone to breakage if the objective binds. |
|
Typical breakage of the plastic part |

|
Remove the end cap. In this instance the metal end cap is threaded and is also secured by a small set screw. Check for a set screw before trying to remove. |
|
Intact |
|
Broken off |
|
Carefully remove the objective barrels, with special care to ease the intact ring at center off without breakage. Take note of which ring for which barrel is on top of the other. |
|
Fit up the broken part, and then fuse it by melting and moving molten plastic around with a pencil tip soldering iron until the breakage is replaced with solid plastic and the shape is restored. Smooth and sand any high spots and fit the ring on the center post . |
|
Clean the objective lenses if required. Lube the sliding surfaces of the objective barrel with silicone grease for low friction movement without binding, as some sort of binding probably caused the original problem.
Then reassemble in reverse order. I have had good luck with this procedure in restoring hopeless sets of non functional binoculars to functional condition. This sort of repair procedure can be viewed as one where you have little to lose. |
|
This center focus design moves the objective lenses and barrels with durable metal parts. Much better idea than the plastic. |

|
IF THIS LUBRICATION METHOD DOES NOT WORK, SEE THE PAGE MORE REPAIRS , SECTION “ Uncooperative Center Focus Mechanism. Repair Tip.” |
|
! |
|
IF THE DIOPTER RING SCREWS DO NOT WANT TO UNSCREW, SEE THE PAGE MORE REPAIRS, SECTIONS Uncooperative Screws. Repair Tip #1. AND Uncooperative Screws. Repair Tip #2. |
|
! |
|
IF THE PRISM SET SCREWS DO NOT WANT TO UNSCREW, SEE THE PAGE MORE REPAIRS, SECTION Uncooperative Screws. Repair Tip #2. |
|
! |

|
DRIP TIP: It can be difficult to get a spray can to dispense a precision amount of liquid even with a straw. A practical alternative is to dip and drip. Spray some lube into the can top, dip a screwdriver into it, then drip a drop where you need it to go. Repeat for quantity desired. |


|
CREEPY CLOWN SIGHTING HILLARY CLINTON WITH BINOCULARS |
|
CONTACT US WITH INFORMATION OR COMMENTS: miniature.binoculars@gmail.com |

|
Fernglas-Reparatur, Réparation de Jumelles, Ремонт бинокля, 双眼鏡修理 |
|
BINOCULAR REPAIR |
|
Kikare Reparation, Reparación de Prismaticos, Riparazione del binocolo |